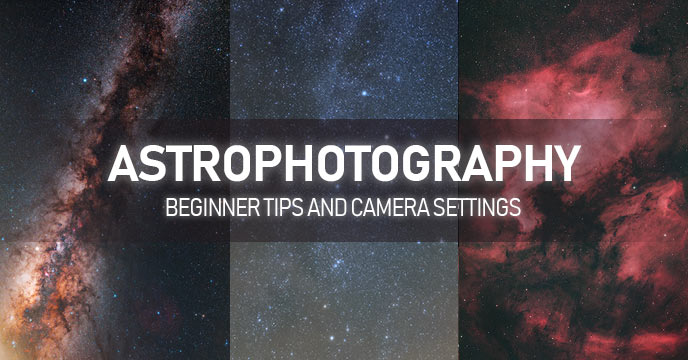
The following astrophotography tips apply whether you are shooting deep-sky objects in space with a DSLR camera and telescope, or with a simple camera lens on a tripod. If you are just getting your feet wet, and are looking to capture a photo of the night sky that includes colorful, sharp stars and maybe a galaxy or nebula – these 7 astrophotography tips will help you get there.
As a preface, the bare minimum you will need to take an astrophotography image like the one below is a DSLR Camera (here are some of the ones I recommend), a basic camera lens, and a sturdy tripod. DSLR astrophotography is gaining popularity across the globe, as modern digital cameras make the hobby so much easier than it used to be in the days of film.
I’ve been shooting with Canon DSLR cameras for many years, but modern DSLR and mirrorless camera bodies by Nikon, Sony, Pentax, and Olympus are capable of incredible astrophotography. Below, is a photo of the constellation Cassiopea using a Pentax K1 Mark II with a 24-70mm F/2.8 lens.
For an extraordinary shot, additional accessories such as a remote shutter release cable and a star tracker mount are recommended, but not necessary. None of the images on this page were captured using a telescope.
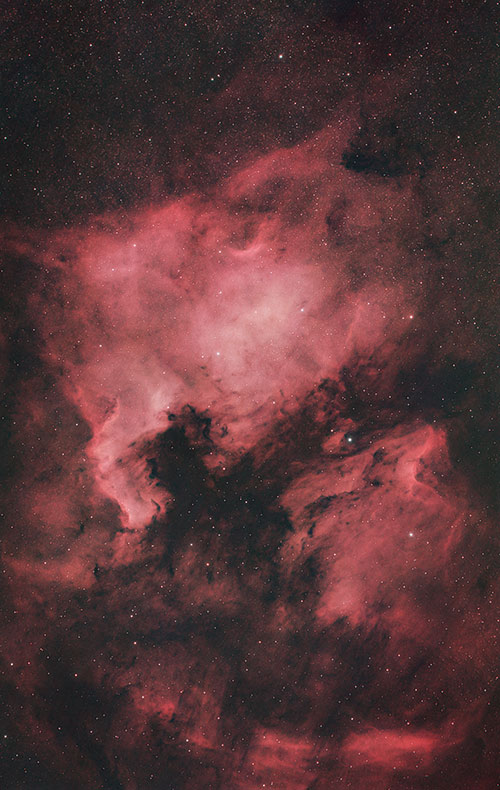
In fact, camera lenses have produced some of my favorite astrophotography images to date, primarily due to the wide areas of the night sky they can capture at once. The image of NGC 7000 (a hydrogen emission nebula in Cygnus) below was captured using an affordable Rokinon 135mm F/2 camera lens.
Astrophotography has the reputation of being expensive, but to partake in this rewarding hobby all you really need is a camera and a view of the night sky above. You can set up in your backyard, a balcony or any outdoor space that includes a view of the night sky. Beginners often ask me which targets to shoot first, but the answer to that question depends on the optical instrument you are using.
The two most influential factors of your gear that will decide the types of subjects available to you are the focal length of the lens used, and whether you are tracking the movement of the sky or not.
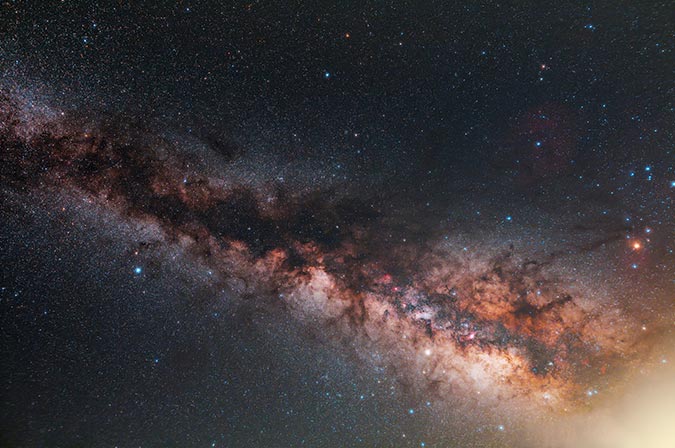
For example, if you have access to a manual Dobsonian telescope, photos of the Moon and Planets are possible using a smartphone or point-and-shoot digital camera. If you are using a DSLR or mirrorless camera and a wide-angle lens, incredible landscape photos of the Milky Way are within your reach. The image below was captured using a cheap Rokinon 14mm F/2 lens on a Canon EOS Rebel T3i DSLR.
The truth is, capturing astrophotography images with your camera only gets you half of the way there. It’s the image processing stage that completes the equation, and it’s one of the reasons astrophotography can be so challenging. If you are looking for help in this department, I have put together a premium image processing guide that walks you through the techniques I use in Adobe Photoshop: Astrophotography Image Processing Guide.
Beginners often start out with an entry-level DSLR camera and lens (I started with a kit like this). At this stage, I would recommend focusing on an area of interest in the night sky that includes a familiar constellation, star cluster or even a bright galaxy or nebula. You can download a planetarium software on your computer or phone to help you plan out your imaging session.
Getting Started
If you are a long-time follower of this blog and are more interested in deep-sky astrophotography tips and the details of my latest equipment, please view this post as an entry point into the hobby for beginners. There are many aspiring astrophotography enthusiasts looking for actionable, useful information and I want to be the one that provides it.
Chances are, my personal journey into this hobby was a lot like yours. It began with a desire to share the amazing beauty of our night sky with others.

What settings do you use for astrophotography?
Usually, when people ask this question, they are referring to a setup that includes a DSLR camera and lens pointed towards the night sky. Often times this is an attempt to capture the Milky Way over a beautiful landscape or simply a dark rural area. Many of the same settings that work for a stationary tripod photo also apply when connected to a telescope for deep-sky imaging.
I have been capturing astrophotography images with a DSLR camera for years, and certain aspects of my technique have not changed. There are some general best practices and camera settings that apply to many types of astrophotography, including those shooting the night sky with a basic camera and lens.
- Use manual or bulb mode
- Use a “fast” aperture of F/2.8 – F/4
- Set your white balance setting to daylight or auto
- Set your exposure length to 15-30-seconds
- Shoot in RAW image format
- Use Manual Focus
- Use an ISO of 400-1600 (or more)
- Use the 10-second delay drive mode
Obviously, to generalize these tips leaves out the subtle variations and nuances that occur when putting these steps into practice. For example, lenses often perform better when “stopped down” from their fastest aperture. This can result in sharper stars with less chromatic aberration. So take these settings with a grain of salt, and experiment with them for yourself.
You may have heard the phrase “the 500 rule” before. This is a calculation that is used to give you a useful exposure length to avoid star trails. The focal length (magnification) of your lens and the camera you use (crop-sensor, full-frame, etc.) will decide the length of time you can expose the shot before stars begin to trail.
This is a useful calculation to consider if you are not using an equatorial mount that tracks the apparent movement of the night sky. The 500 rule can be very handy when photographing the Milky Way, or any wide-angle nightscape shot that includes the stars above.
The 500 Rule:
500 Divided By the Focal Length of Your Lens = The Longest Exposure (in Seconds) Before Stars Start to Trail
For example, if you are using a 50mm lens on a full-frame camera, the longest exposure you can shoot without star trailing would be 10-seconds. If you are using a crop-sensor DSLR camera, you’ll need to multiply the focal length by that value. In the case of my Canon EOS Rebel series DSLR’s, this is a value of 1.6. Experiment with your camera under the night sky and use what works best for you, but this is a great benchmark to follow.
Astrophotography Tips
Highly actionable advice you can try with your DSLR camera tonight… if it’s clear!
These days, I live and die by the weather forecast. My closest friends and family know that all of my social engagements revolve around a clear night sky. If it’s new moon, and the sky is clear, only the most important on plans and holidays will receive my time and attention. The nature of this hobby is that you are bound to the weather, and the clear skies needed for astrophotography can be quite rare.
With a glimpse into my reality out of the way, here are 7 astrophotography tips that are essential for a successful night shooting under the stars.
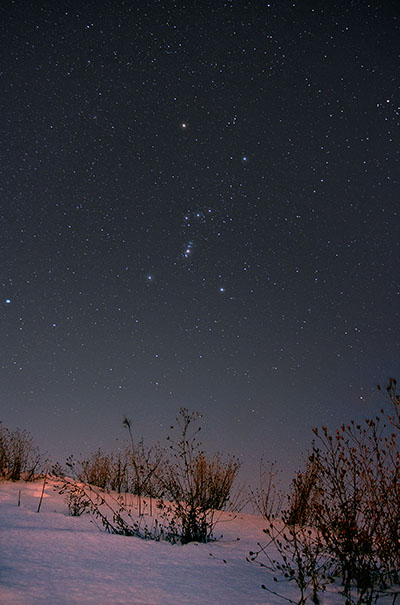
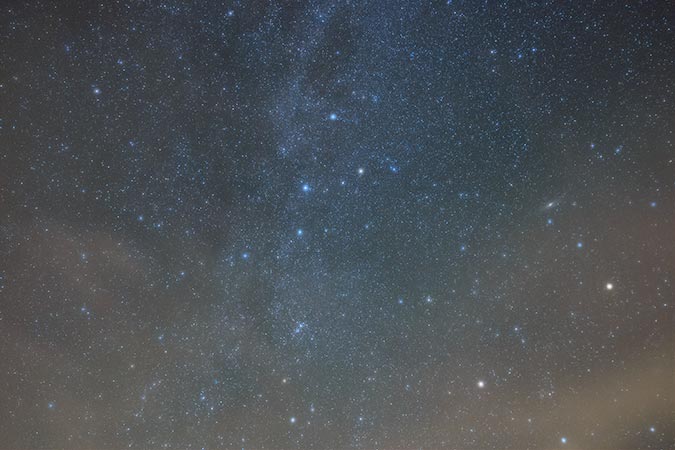
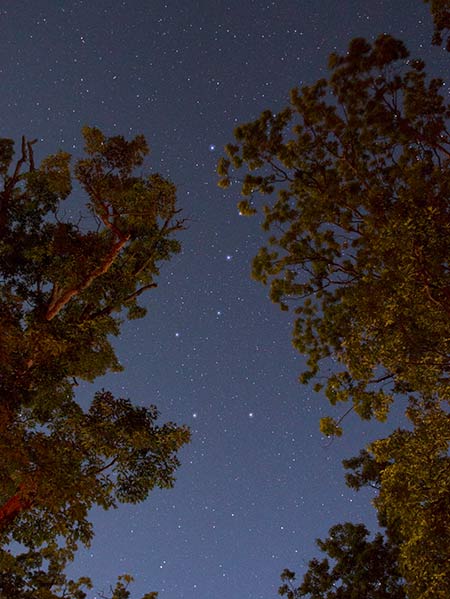
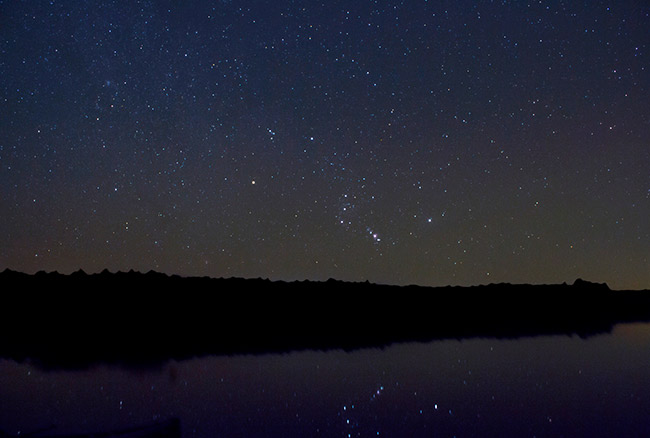
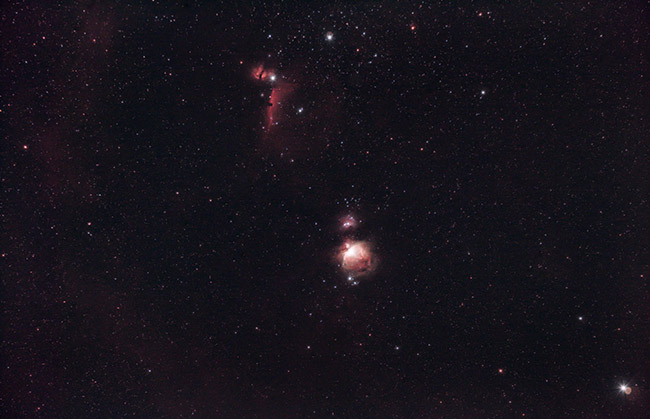
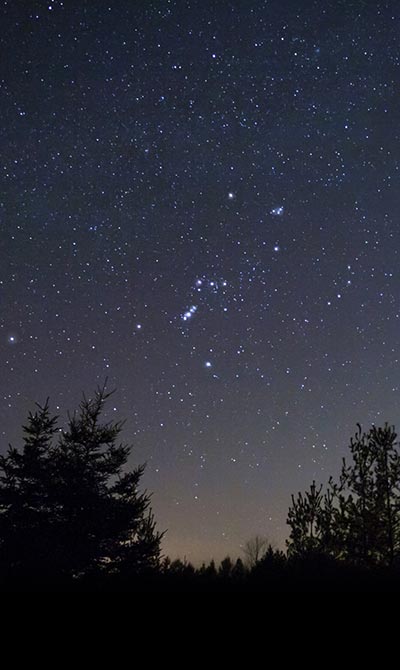
The Orion Constellation using a Camera and Lens on a Tripod
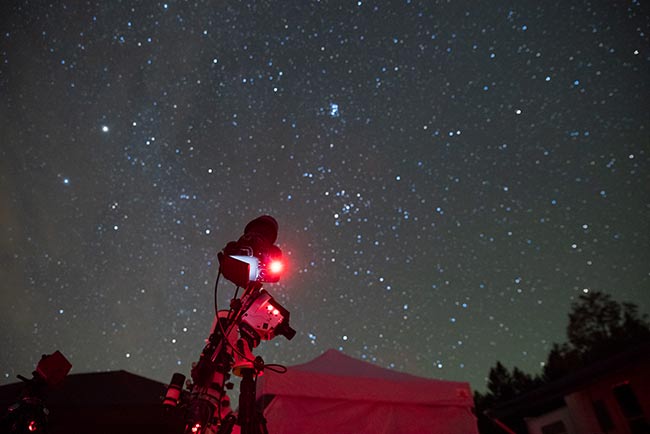
Use the Cameras Delay Timer or a Remote
We shoot long exposure images to capture as much light (or signal) as we can in the image. This requires leaving the camera shutter open for long periods of time while the dim lights from space are collected. The tricky part is, the camera needs to either remain perfectly still or better yet move with the night sky for a clear shot.
Any shake of the camera caused by something like actually touching the camera is enough to ruin the image. To avoid this there are a number of options, with the simplest being to use the delay timer built into your camera settings. This setting will be found in the drive mode area and is usually in the range of a 2 or 10-second delay.
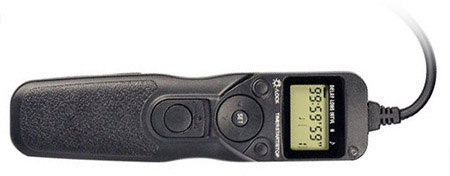
A remote shutter release cable allows you to set a series of long exposures
An even easier and more effective method is to use a remote shutter release timer to control the captures. (this is the one I use) This way, you will not touch the camera whatsoever and can avoid a blurry image with oblong stars and trails. Not to mention, these cables allow you to shoot exposures longer than 30-seconds, and to automate a series of shots.
Advanced imagers will use a dedicated camera control software to automate their imaging session (I use Astro Photography Tool). I don’t recommend this option until you have an equatorial telescope mount, as adding this element to the acquisition process involves a much steeper learning curve and experience to enjoy. In the early stages, stick with a simple and inexpensive intervalometer to take your photos.
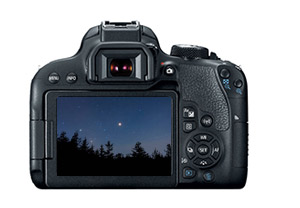
Use Manual Focus and Live View on a Bright Star
Learning how to focus your camera for an astrophotography image is one of the first big hurdles to overcome when entering this hobby. The camera lens needs to be on manual focus (MF) mode, as the stars are too dim and too small for the camera to use autofocus on.
Taking the time to focus your camera lens is vitally important, as an out-of-focus shot is unrecoverable. Camera noise and star trailing can be corrected and hidden to an extent, an unfocused shot cannot.
To focus your camera lens, find the brightest star you can find in the night sky (or the moon/bright planet). Turn on the “live-view” mode of your camera, which essentially turns the display screen into a live video of what your sensor sees. Using the camera settings listed below, you should see at least one bright star on your camera’s LCD display screen.
Once you are confident that you are in-focus, take a few test shots to frame up your subject.
Camera Settings for Focusing the Lens:
- Mode: Manual or Bulb
- Lens Mode: Manual Focus
- Aperture: F/4 or below
- White Balance: Daylight or Auto
- Exposure: 30-seconds or Bulb
- ISO: 1600 or above
The reason you’ll want to use these exaggerated settings us to let as much possible light reach the sensor as possible. You will want to dial back the settings before actually taking your picture, but these camera settings are important when focusing your lens. If your camera and lens allow you to set an ISO of 12800 and set your lens to F/2, you’ll likely see many stars in the live view display.
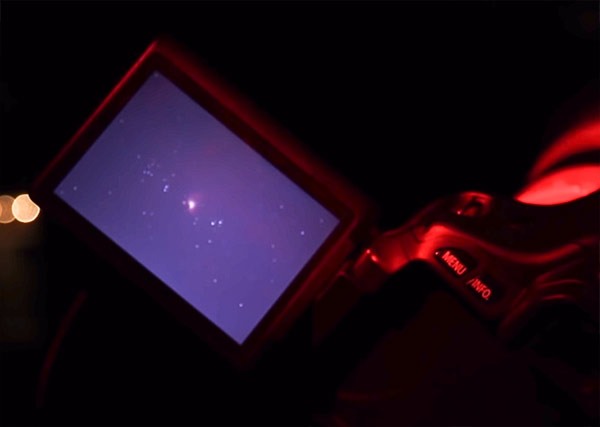
Some of the brightest stars in the northern hemisphere to help you focus include Sirius, Vega, Deneb, Altair, Arcturus, Betelgeuse, and Cappella. These stars are all bright enough to see in your live-view display to help you focus the lens.
Constellations with bright stars like Orion will help when using live view to focus
If you are certain that your camera lens is pointed towards a bright star, and still see a completely black screen, ensure the following scenarios are not present:
- The lens cap is still on your lens (take it off)
- You are not using exaggerated camera settings for maximum light (adjust ISO, exposure, and f-stop)
- The lens is so out of focus (rack focus in and out and look for the star)
Once you can see the star in on the camera’s display screen, zoom in on this bright star, at 5X zoom, and then 10X zoom (the location of this button will depend on the camera body used). While in 10X zoom mode, slowly adjust the focuser on your lens until the star becomes a small pinpoint of light. You will have to go back and forth, in and out of focus many times before you find the spot where the pinpoint is smallest and sharpest.
You can take test exposures and compare your results to confirm the stars in the image are as small as possible. By keeping the image preview zoomed in while switching between preview images, you should be able to distinguish between the subtle changes in the size of the stars. Take the time to adjust the lens so that your stars are as small and sharp as possible before taking your actual photos.
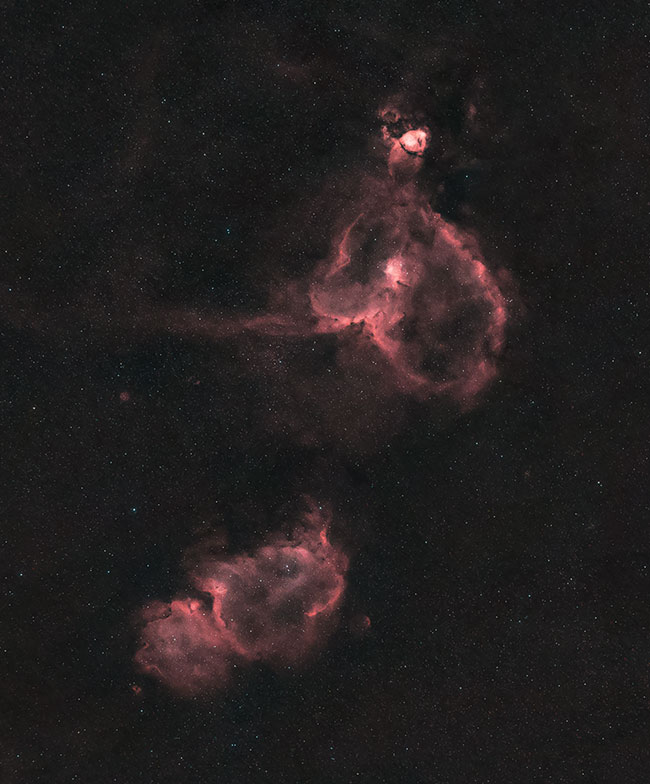
The Heart and Soul Nebula in Cassiopeia (DSLR and 135mm lens).
For the photo above, I used a Rokinon 135mm F/2 lens with a crop-sensor DSLR camera to capture both nebulae in a single shot. There are many large, wide-field nebulae in the night sky that are suitable for a camera lens. On the other hand, most galaxies are beyond the abilities of a camera lens, as they are quite small. The Andromeda Galaxy and Triangulum galaxy are two exceptions.
Setting White Balance (RAW Mode)
It’s easy to get caught up in trying to choose the best white balance settings for astrophotography. The truth is if you are shooting in RAW image format, it doesn’t really matter. When you shoot in RAW mode, you can change the white balance settings to whatever you want after the photo has been taken.
When you open up the RAW image file in Adobe Photoshop, you are greeted with one of my favorite photography applications of all time: Adobe Camera Raw(as long as your camera is supported). This allows you to manipulate your raw image files in powerful and dynamic ways.
To adjust the white balance, you can select a preset option from the dropdown menu for the traditional photography color temperatures. You can also adjust the slider manually for the exact color temperature you want.

Setting the white balance of your RAW image using Adobe Camera Raw.
The daylight white balance setting is often the best choice for astrophotography. It is using the white created by our own star (the Sun) to give you the most accurate color rendition of the stars in the night sky.
In the image below, you’ll see how setting the right white balance can really impact your overall image. This is the only image on this page that was taken through a telescope (a very small refractor). The top image is a single 90-second exposure with no calibration or color balancing. The bottom image is a stack of 18 x 90-second exposures that have been calibrated and color balanced.
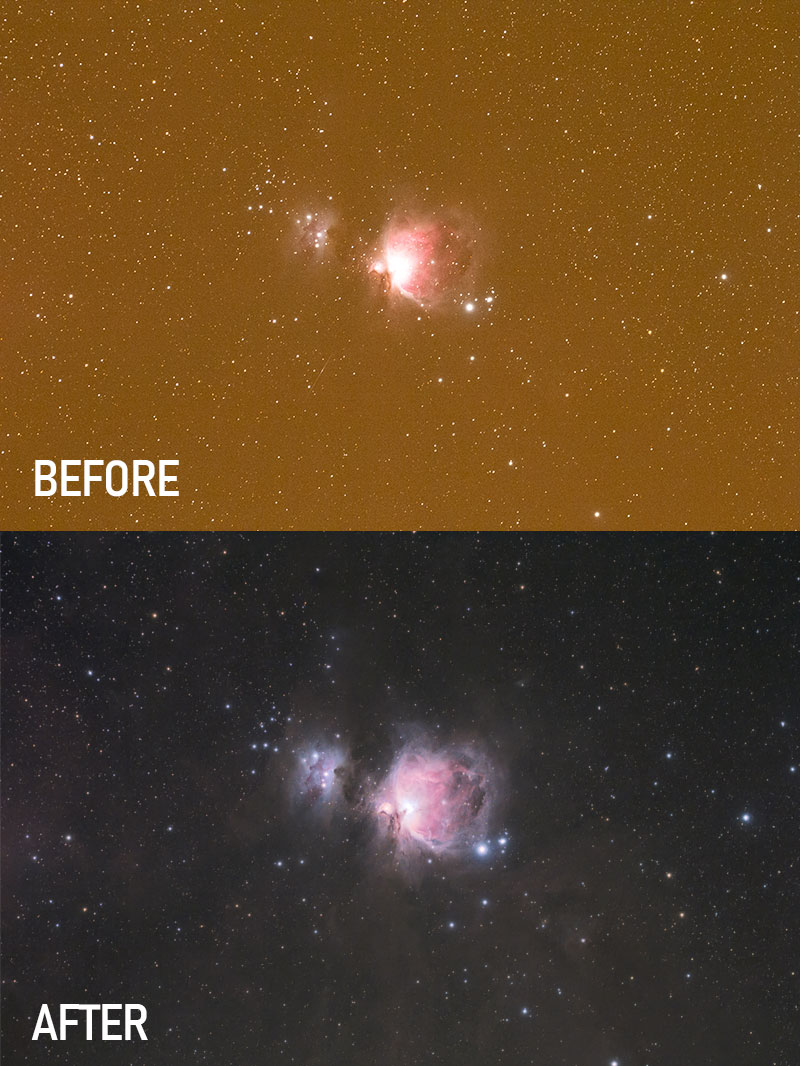
Don’t worry if your sky has a pink/orange hue to it when you preview your images, this is typical of shots taken from areas with light pollution. A simple color balance of the background sky in Adobe Photoshop can bring your sky back to a more attractive neutral grey or blue color.
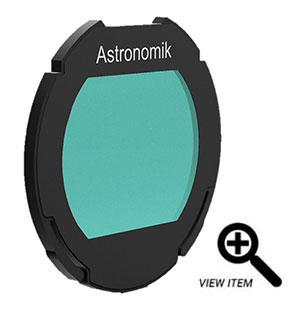
Use a light pollution filter
You can also try a light pollution filter (here are some of the astrophotography filters I use) to reduce the glow of nearby artificial lighting. I have used a number of filters for astrophotography in my city backyard, and have found the Optolong L-Pro filter to be one of the best at producing natural-looking star colors.
When choosing a light pollution filter for your camera, consider the type of artificial light you are dealing with. For example, from my backyard, a filter that minimizes the bright blue/white light from modern LED streetlamps is important.
For stock DSLR and mirrorless cameras, I recommend trying the Astronomik CLS filter as it is a great balance between practicality and affordability. The clip-in version will fit inside the body of your DSLR camera and can be used with both telescopes and many camera lenses.
What’s the best ISO setting for Astrophotography?
There is no be-all-end-all solution for choosing the correct ISO setting on your camera for astrophotography. DSLR cameras generally create more noise as the ISO is increased, and the sensitivity to light becomes greater. This is a very non-technical description of what changing the ISO does, click here for a more accurate explanation.
The biggest culprit of noise in your images is the camera sensor heating up by collecting light for extended periods of time, using a high ISO setting. For example, a single image exposure shot at ISO 6400 will display more noise than an exposure of the same length at ISO 400. To get around this, amateur astrophotographers will shoot dark calibration frames.
The key to choosing the correct ISO setting for your image is to find a balance between light collected, and the amount of noise produced. Thankfully, by stacking a series of images together, we can improve the signal-to-noise ratio, and cancel out much of the thermal noise created by the camera sensor.
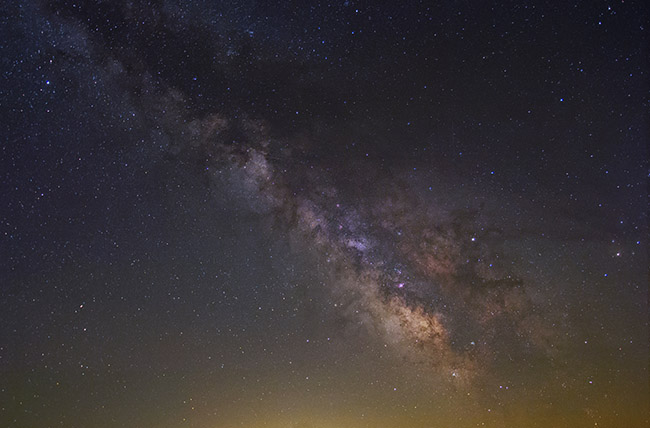
The Milky Way using ISO 6400 (20 x 30-Second Exposures)
I would suggest using ISO 800 for a 30-second exposure to start with. This is often a great starting point, and can be adjusted depending on the amount of light pollution present and/or the f-ratio of your camera lens. In my experience, this is somewhat of a sweet spot for many DSLR cameras.
Using an ISO setting of 800 is enough to collect a healthy amount of “good” signal to reveal objects in the night sky, yet does not have the negative effects shooting with a much higher ISO has. Take some test shots using anywhere from ISO 400 – to ISO 6400. Depending on the camera you are using, you may even be comfortable with the amount of noise captured in images using an even higher ISO setting.
Camera Lens Aperture – Stop Down and Get Sharp
Even the most expensive camera lenses will have a hard time producing sharp, well-corrected stars with the aperture “wide open” (the lowest f-stop possible. Most often, changing the F-stop to one or two steps “slower” will result in sharper stars to the edges of the field. To generalize the science behind this, these settings are less demanding on the optical system overall.
When people mention “stopping down” a camera lens it simply means to drop an F-Stop to a slower aperture with a greater depth of field. What that means for astrophotography, is that you will collect less starlight in the same amount of time, yet the stars in your image will be sharper.
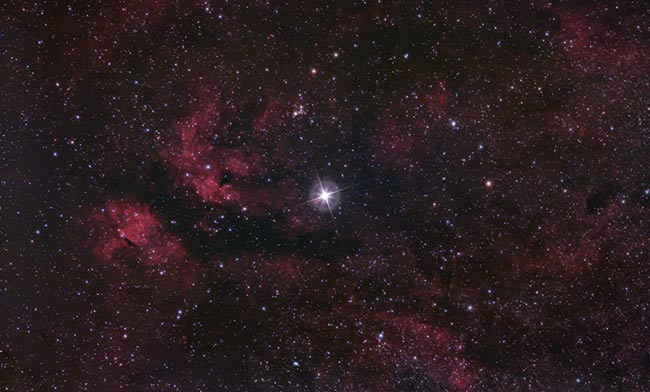
An Aperture of F/5.6 was used for this photo of the Sadr Region in Cygnus (300mm F.4L Lens)
It’s a trade-off, and it can often be hard to justify capturing less light in your image, especially for longer focal length images that include a galaxy or nebula. The effectiveness of each F-stop level for astrophotography will depend on the lens you are using. As an example, when using my Canon 300mm F/4L lens, I opt to shoot at F/5.6 because it produces a sharper overall image.
When using my Canon 50mm F/1.8 lens for astrophotography, I usually stop down to F/3.2. This helps to sharpen the image up and improves the quality of the stars at the edges of the field. Have a look at my results using this affordable camera lens.
Don’t Skimp on the Tripod
A sturdy tripod is an absolute must for capturing images of the night sky, no matter what type of optics you are using. The long exposure, steady nature of night photography demands that the camera remains completely still. A tripod with a ball head is advantageous because it will allow you to point the camera lens straight up towards the sky, and anywhere in between.
Not all tripods are created equal. When mounting your DSLR camera and lens, you need to be sure that it is locked into place and that it does not move over time due to an imbalance in weight. Make sure that all of the adjustment knobs are secure before stepping away to ensure the camera does not fall (this is the one that I use).
Take the time to understand how your tripod works in the daytime before venturing out at night. It can be hard to see what you are doing, and you’ll want to be confident that your camera and lens are secure.
Use a Star Tracker to Go Even Deeper
A star tracker offers you the opportunity to take even better images because your exposure lengths are no longer limited to 30-seconds or less. A star tracker’s job is to compensate for the apparent rotation of the night sky, which lets you dial back camera settings like ISO and F-stop.
Without using a tracking mount that is aligned with the rotational axis of the night sky, stars can begin to trail in as early as 10-seconds. This is fine if you are want to capture a creative shot of the apparent motion of the sky, but for most projects, this is a challenge you must overcome.
For a star tracker to work properly, you’ll need to make sure that the mount is accurately polar aligned and balanced. As you can see in the photo below, the polar axis of the mount is pointed towards the north celestial pole from my latitude (43 degrees north).
The Sky-Watcher Star Adventurer camera mount with a DSLR attached.
A star tracker such as the Sky-Watcher Star Adventurer (pictured above) will track the movement of the sky. This means that you can now shoot much longer exposures on deep-sky targets to reveal faint nebulae, galaxies and star clusters without star trailing.
Keep an eye on the Histogram
The histogram gives you a visual reputation of the data collected in your image. This information can indicate potential issues in your image such as areas that are too bright or too dark. The perfect placement of the “peak” or “mountain” of the histogram in an astrophotography image is debatable, although I usually like to see it somewhere in the middle. Don’t obsess over this technical aspect, as it can largely be changed in post-processing anyway.
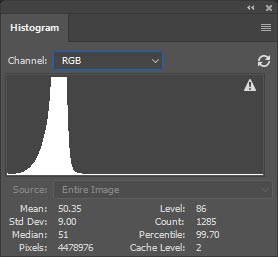
If you notice that the data in the histogram is “clipped” on either side, you will need to make adjustments to your exposure length, aperture or ISO setting. If the image clips data on the left side of the histogram, it means that you will have unrecoverable data that is pure black in your photo. No amount of level adjustments in Photoshop will bring these details back.
If the histogram shows clipped data to the right, it means you have “blown out” certain areas of your photo that will display as pure white. This can be a bright light, the overall light pollution in the sky, or even the brightest area of a deep sky object such as the core of a galaxy. Try to keep the pixel information in your histogram in the middle of the graph or slightly to the right to ensure you have sufficient data to process later.
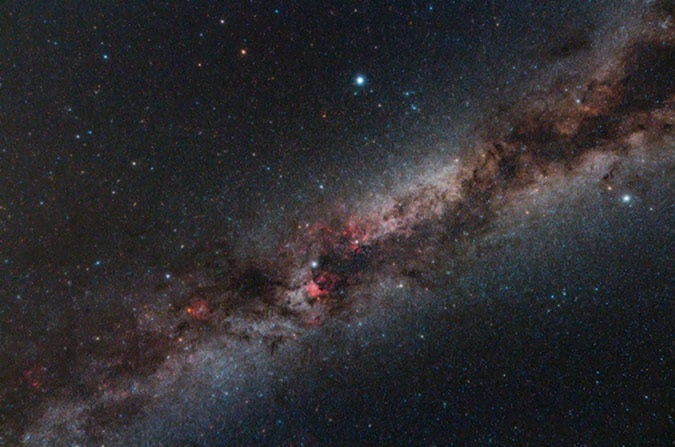
Deep Sky Astrophotography using a 105mm Camera Lens on a Star Tracker.
Final Thoughts and Expectations
Depending on which techniques you counted, there were actually 8 astrophotography tips or more in this article. If you’re a beginner to this hobby, I hope that you learned at least 2-3 new tricks to try out the next time you are outside with your camera.
On nights when everything goes right, it can be easy to stay motivated for your next project. On the other hand, nights that are plagued by technical issues or weather can be very discouraging. I urge you to push forward with your own techniques and take stock of your personal improvement between images.
If I can offer one piece of wisdom from years of astrophotography trial and error, it’s progress that will inspire you to keep going.
The Milky Way towards the constellation Cygnus. Canon Rebel DSLR and 14mm lens.
Where to Go From Here?
The next step in the evolution of your astrophotography endeavors is to understand the process of “stacking” multiple long exposure images together to improve the signal-to-noise ratio. This is an essential technique to learn so that you can maximize the amount of detail captured in your images.
Before diving into stacking software such as DeepSkyStacker, I recommend stacking your images manually in Adobe Photoshop to get a first-hand look at why this technique is so powerful.
When you ready to enter the world of deep-sky astrophotography through a telescope, be sure to have a look at the astrophotography telescopes I recommend. If you’d like to see a step-by-step walkthrough of my deep-sky process (using a telescope), have a look at the following video: Deep-Sky Astrophotography How-To
Credit goes to Trevor Jones from AstroBackYard for this article.
