1. Update firmware & app, enable EQ mode
- Make sure your Seestar S50 is running the latest firmware (the EQ mode functionality is part of a recent update) and your Seestar app is up to date. AstroForum Space+2Seestar+2
- In the app navigate to: Advanced Features → Mount Mode, and select EQ Mode (rather than the default Alt-Az mode). AstroForum Space+1
- The documentation from the manufacturer explains the process. Seestar
2. Physical mount setup (tripod + wedge)
Since EQ mode means your optical axis will track like an equatorial mount, you’ll need a mount geometry suited to that. Key steps:
- Use a solid tripod (ideally a heavy duty one) or an equatorial wedge attached to your tripod. Many users caution the stock Seestar tripod may be marginal in EQ mode. ZWO User Forum+1
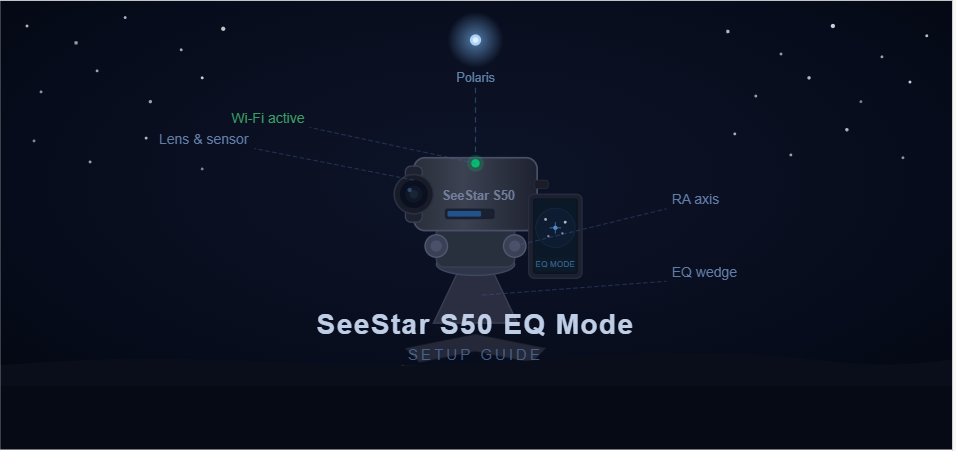
- Set up the tripod so one leg or reference direction is pointing roughly towards the celestial pole (in the Northern hemisphere this is roughly north / towards the star Polaris). SolarChat+1
- Attach the Seestar S50 so that its azimuth axis / polar alignment axis is effectively aligned to the celestial pole; you’ll tilt the mount by an angle roughly equal to your local latitude (or depending on your wedge configuration, the complement of latitude) so the S50’s axis is aligned with Earth’s rotational axis. Reddit+2YouTube+2
- One reddit user: > “With the S50 off, face it so that the power button is facing west and the rotating arm is facing east. Tilt … the angle should be 90 minus your current latitude.” Reddit
- Another guide says set the wedge altitude to your latitude, place the Seestar on it with power-button facing up and telescope pointing north. AstroForum Space
- Leveling: There’s some debate — a level base helps minimise cross-axis error, but polar alignment is ultimately what matters. ZWO User Forum+1
3. Initial alignment & calibration via app
- Turn on the Seestar, open the arm, and allow the S50 to perform its horizontal calibration (the mechanical/optical system expects being level or known orientation). One user: > “Once it completes successfully, you’re in EQ mode.” Reddit
- In the app go to Polar-Align routine: it may provide a “Get Polar Align Deviation” function (or similar) which tells you how far off you are from perfect polar alignment. Use the altitude and azimuth controls on your wedge/tripod head to reduce the deviation until within acceptable tolerance (green or minimal). AstroForum Space+1
- Sync on a star (or perform the Seestar’s horizon/sky calibration) if required; some users mention this step is necessary to “let it know where it is pointing”. Cloudy Nights+1
4. Set operation mode & imaging parameters
- With EQ mode engaged, you’ll now benefit from longer exposures and better tracking – for example, one blog says exposures up to ~30 s are feasible compared to ~10 s in Alt-Az mode. AstroForum Space+1
- In the Seestar app, switch the mount mode to EQ, select your target as usual, focus and start imaging/stacking.
- Because you’re doing astrophotography (and you already do stacking, calibration frames etc) you might want to integrate the Seestar’s output into your normal workflow: darks/flats if supported, and watch for field rotation (should be minimal if polar alignment is good).
- Monitor star roundness: if stars elongate or show odd drift, polar alignment or mount stability are likely the issue.
5. Optimise and troubleshoot
Here are some tips especially relevant given your detail-oriented astrophotography style:
- Mount stability: Many users report that in EQ mode the tripod or wedge must be very stable. A lightweight tripod may allow micro-vibration or flex, harming long exposures. ZWO User Forum+1
- Polar alignment precision matters: Even small misalignment can lead to field rotation especially for exposures of tens of seconds. One user said they struggled until they aligned closely to Polaris. Cloudy Nights+1
- Latitude setting/detail: The tilt angle must be accurate for your location. Use a digital inclinometer if possible.
- Firmware/app quirks: Because EQ mode is a “newer” feature for the Seestar, keep an eye out for firmware bugs, and ensure you’re using recommended accessories (wedge, mount head).
- Imaging limits: Even with EQ mode the Seestar is still a compact smart telescope — your results will depend on sky conditions, optics, etc. One article notes the update is “the best update for this little scope” but you still need good alignment. AstroForum Space+1
- Tripod leg orientation: Position one leg facing north (or referencing pole direction) helps when setting wedge/alt/az adjustments. Reddit
- Exposure testing: Start with moderate exposures (e.g., 20-30 seconds) and examine star shapes, then increase if all is good.
- App workflow: Spend some time with the Seestar app in daylight to familiarise yourself with the menus: “Mount mode”, “Polar Align”, “Get Polar Align Deviation”, etc.
- Accessories: Consider adding a rigid support or anti-vibration pad if the setup is lightweight. The user forums flag that the stock tripod may flex. ZWO User Forum
6. Example step sequence (for your location: Hazleton, PA ~ 40.9° N)
Here’s how you might apply this locally:
- Choose a stable tripod and optionally an equatorial wedge. Ensure the tripod is placed in a clear area with good sky view and minimal vibration (e.g., less ground movement).
- Orient one leg or a reference towards true north (use a compass or smartphone app and correct for magnetic variation).
- Mount the Seestar S50. Tilt the mount to an angle ≈ your latitude (~40.9°). For example, set wedge altitude to ~40.9° (or based on wedge instructions).
- Attach S50 so its optical axis/power-button orientation matches instructions (e.g., power button facing up, front aimed north).
- Power on the S50 in still daylight if possible. Open the arm. In the app select EQ mode.
- Run “Get Polar Align Deviation”. Adjust altitude and azimuth bolts until deviation is minimised (green or acceptable).
- Once aligned, pick your first target (for example one of your favourite Messier objects) and start with ~20-30 s exposures, stack, evaluate star roundness.
- If stars appear elongated, revisit alignment adjustments or check mount rigidity.
- Save your alignment so next nights you set up faster.
- For your outreach/imaging workflow (since you often produce high-resolution, educational prints), consider capturing more frames now that tracking is better, then stack and process in your usual pipeline (e.g., your PixInsight or equivalent workflow).
https://youtube.com/watch?v=eYZKh6DGlOk%3Frel%3D0%26playsinline%3D1%26origin%3Dhttps%253A%252F%252Fchatgpt.com%26enablejsapi%3D1%26widgetid%3D1%26forigin%3Dhttps%253A%252F%252Fchatgpt.com%252Fc%252F68fe16f0-3d60-8326-9567-65837082b62c%26aoriginsup%3D1%26vf%3D1
https://www.youtube.com/embed/eYZKh6DGlOk
The above tutorial video gives real-time visuals of the EQ mode setup, which can be very helpful.